Guide
Walkthroughs & 360 tours
Updated August 30, 2026
In this guide1. What a tour adds·2. Record the walk·3. Upload the walkthrough path·4. Choose how to add the 360 tour·5. What processing does·6. Check the face blur·7. Photos only: place each station·8. The alignment workflow·9. Run the quick pass first·10. Read the badges·11. Fix a station by hand·12. Save the tour·13. Walk the finished tour
The whole process in one line: upload the files, let processing place the stations, run the automatic alignment, fix the stations it flags by hand, then press Save tour. Steps 1 to 7 get the tour into the viewer; steps 8 to 12 align it; step 13 is using it.
What a tour adds
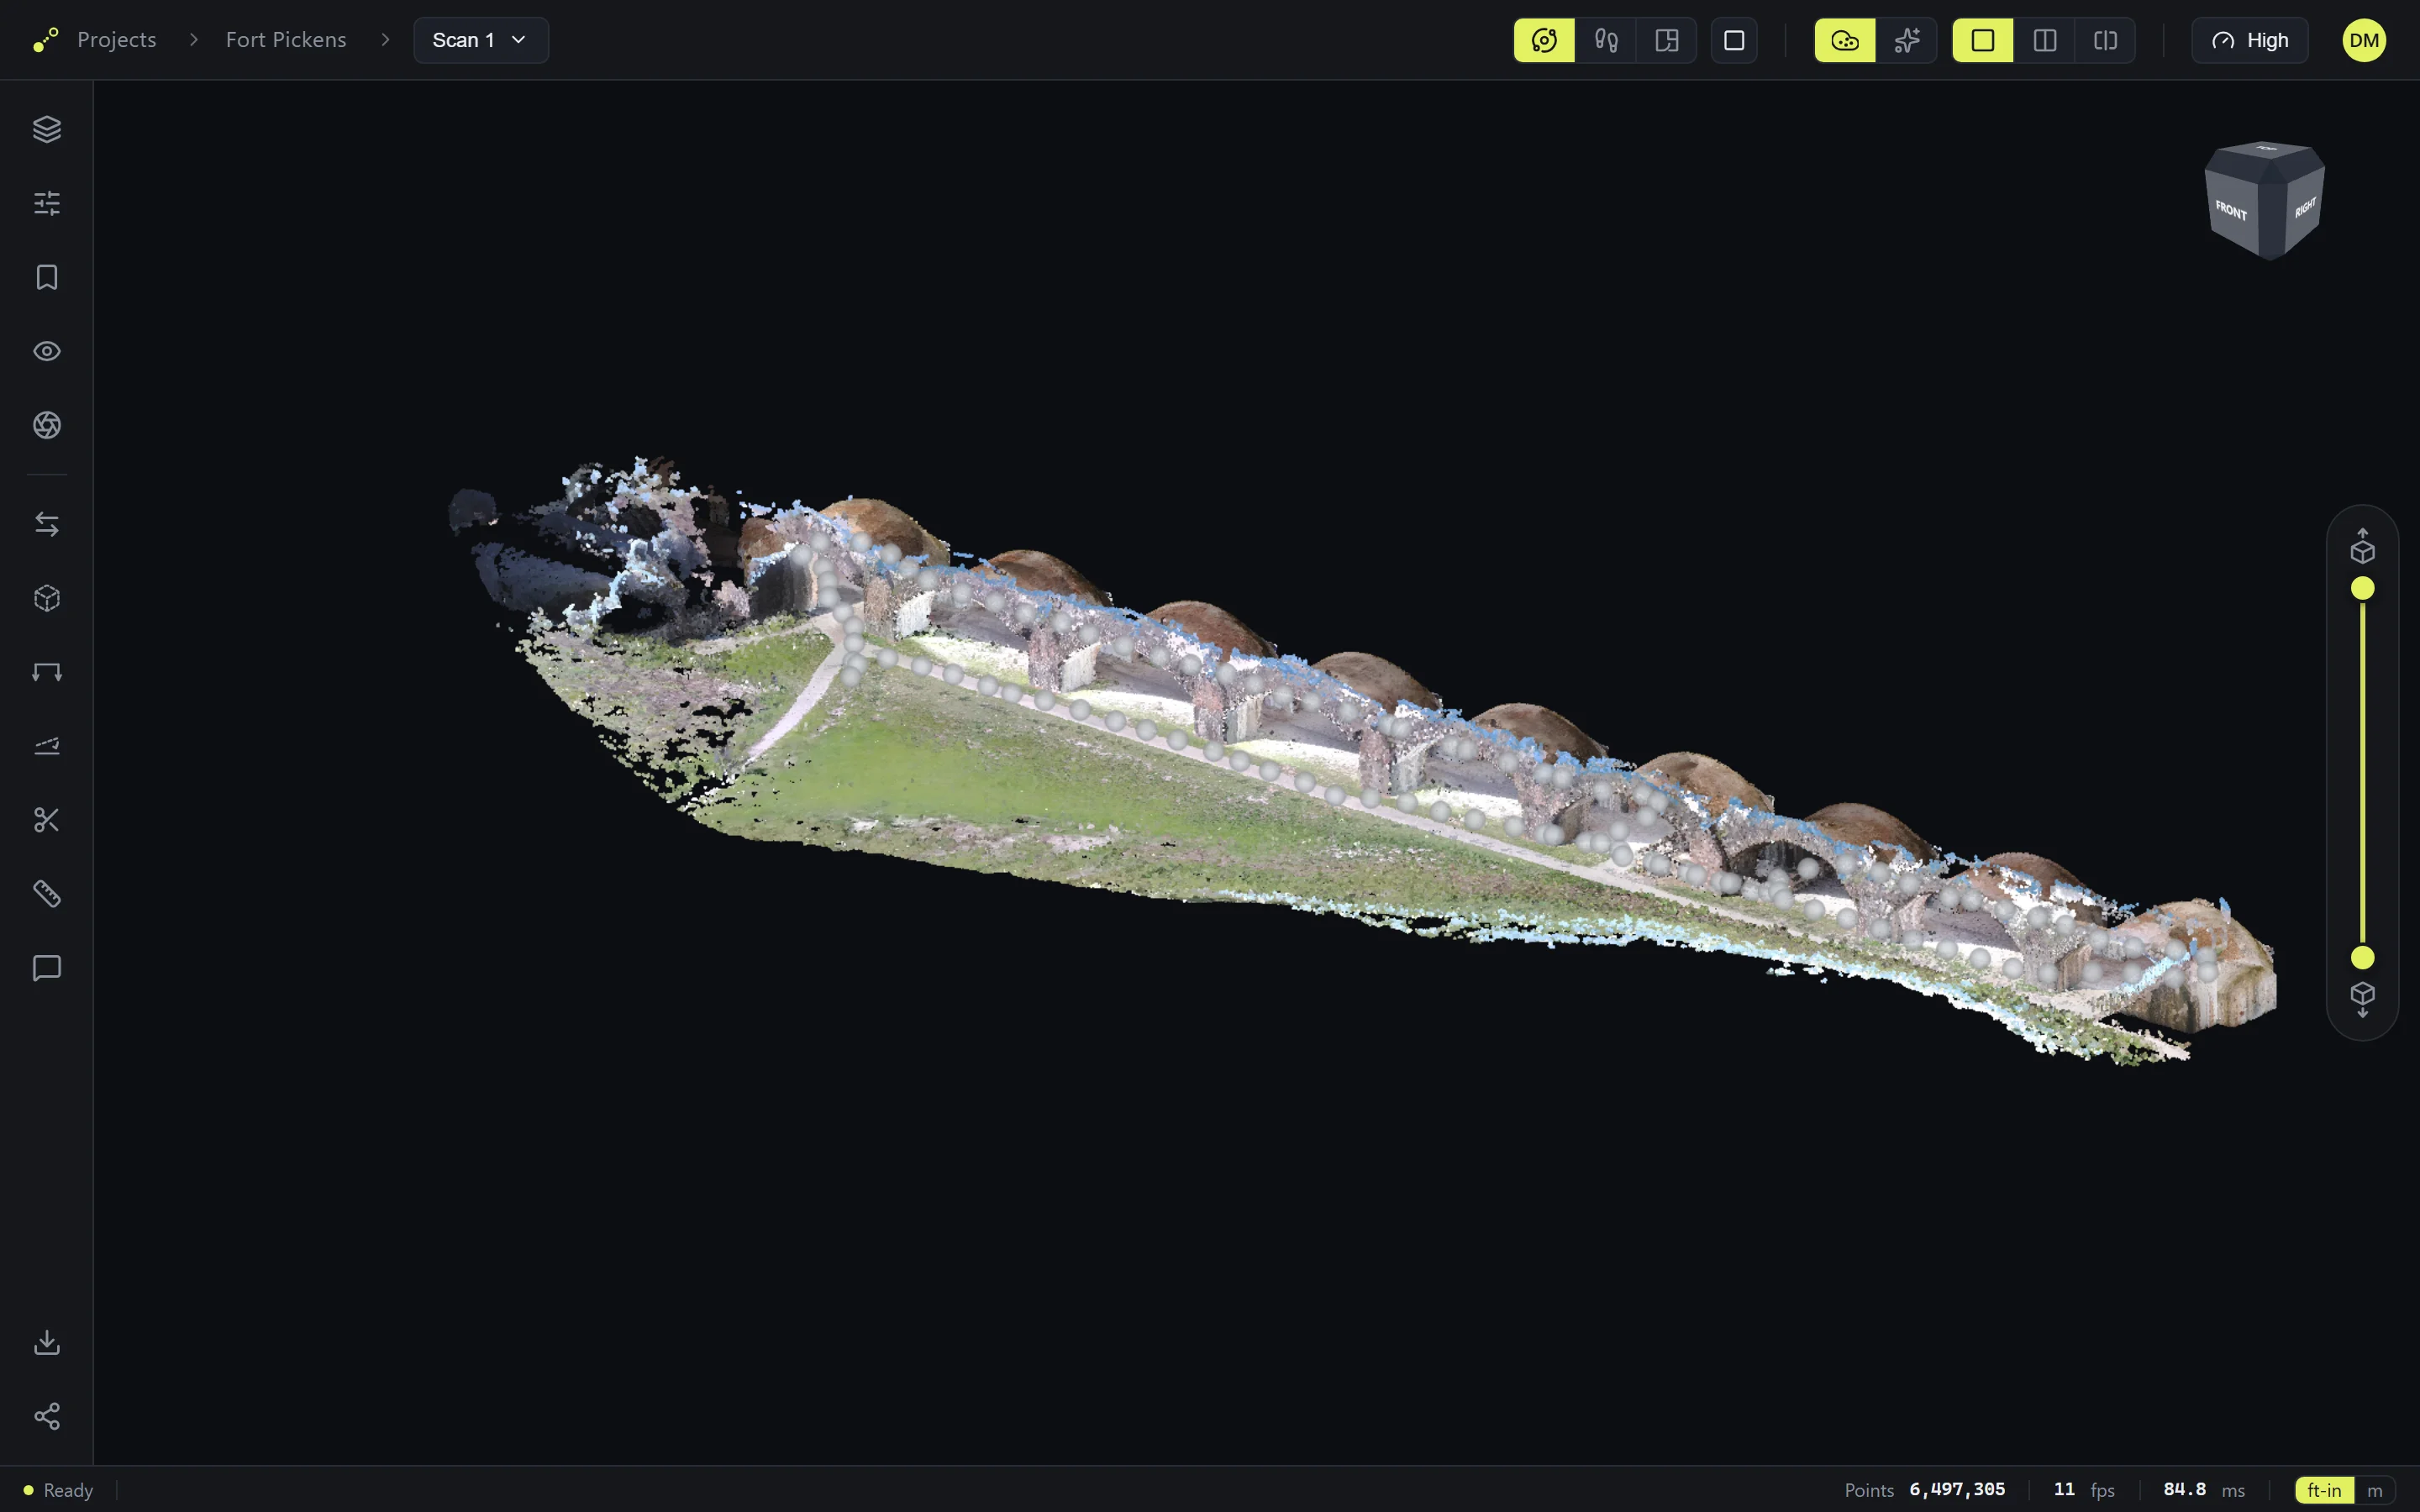
The walkthrough path puts the walked route into the viewer, so anyone can walk the scan at eye level and see where every station is. The 360 tour adds the real camera photos at those stations: stand in the scan and look around in the actual photo. Both are optional and upload from the scan's file dialog like everything else. If your export has them, upload them — they are most of what makes a shared scan feel like being there.
Record the walk
Two things matter for a tour that syncs to the scan: shoot the 360 video in timelapse mode at 0.5 seconds per frame (this matches the SHARE3DCAM scanner's default 3DGS image-capture interval), and start recording before the scan starts, stop after it ends. Everything else is up to how you like to capture.
What works well for us: an Insta360 X5 mounted on a hard hat, so both hands stay free for the scanner. Since your phone is connected to the scanner during capture, control the camera without it — either enable voice control on the X5 and start it by speaking, or use a small Bluetooth remote clipped where you can reach it.
Upload the walkthrough path
Upload the export's trajectory.txt. It appears immediately — no processing — and adds the route and minimap to the viewer.
Levels are detected automatically from the walkthrough path — nothing to set up. A scan with only a 360 tour uses its station heights instead, and a point cloud alone counts as one level (the height slider still cuts to any floor by hand).
When a scan has more than one level, the minimap gains a level bar — one button per floor, top floor on top. The map shows the level you're standing on, switches as you take the stairs, and clicking another level takes you there. Plan view and orbit get their own level bar (1 · 2 · All) that shows one floor at a time. Single-level scans show none of this.
Choose how to add the 360 tour
There are two ways to add a tour. They end in the same place, but one does most of the work for you:
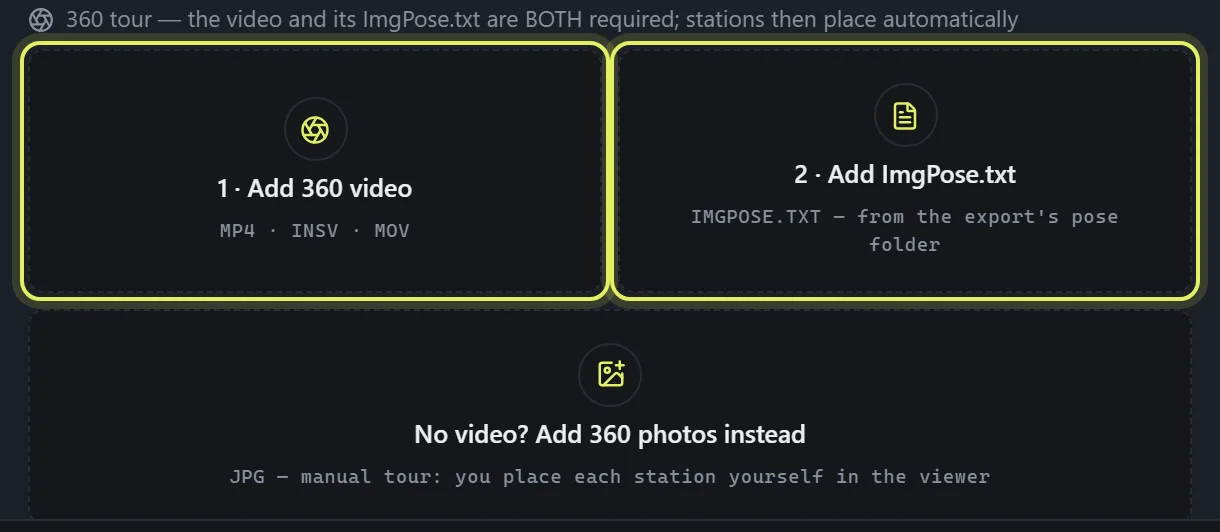
- Timelapse video + ImgPose.txt (recommended). First export the capture as a 360 (equirectangular) MP4 in Insta360 Studio — the camera's raw .insv file can't be matched to the scan. Upload that MP4 (or MOV) and the export's ImgPose.txt — both are required, in either order. Export at the capture's own resolution (5.7K or 8K, no downscale): the viewer keeps that detail on desktop, and phones offer it per photo with the Full quality button. Processing places every station on the walk path for you. This is the mostly automatic route; only the alignment check is left to you.
- 360 photos only. Upload individual 360 photos (JPG) instead. These also need to be exported first — a stitched 360 JPG from the Insta360 app or Studio, not the camera's raw files. This makes a manual tour: the photos arrive unplaced, and you place each station on the model by hand (step 7) before it can be aligned.
What processing does
Tours take longer to process than clouds and splats. While the tour shows Processing, the server is doing this:
- Matches the video to the scan. It works out which video frame belongs to which scan position by comparing the camera's motion with the scanner's. No clock syncing is needed — it finds the match itself.
- Picks the stations. It spaces stations along the walk, takes the sharpest frame near each one, and saves it as that station's 360 photo.
- Blurs faces. Every photo goes through the automatic privacy pass before it is stored (step 6).
- Places the stations on the model. Each station is dropped on the walk path with a first estimate of which way the camera was facing.
For a photos-only tour, processing only blurs faces — there is no video to match, so the photos wait for you to place them.
The important part: when processing finishes, every station is in roughly the right place, but none is aligned yet. The heading, height, and exact position of each photo are estimates until the alignment in steps 8 to 11 confirms them. A tour straight out of processing will look close but not right inside the 360 view.
Check the face blur
People caught in your capture get their faces blurred automatically during processing. There's nothing to turn on — it runs on every station of every tour, so bystanders don't end up identifiable in your shared scans.
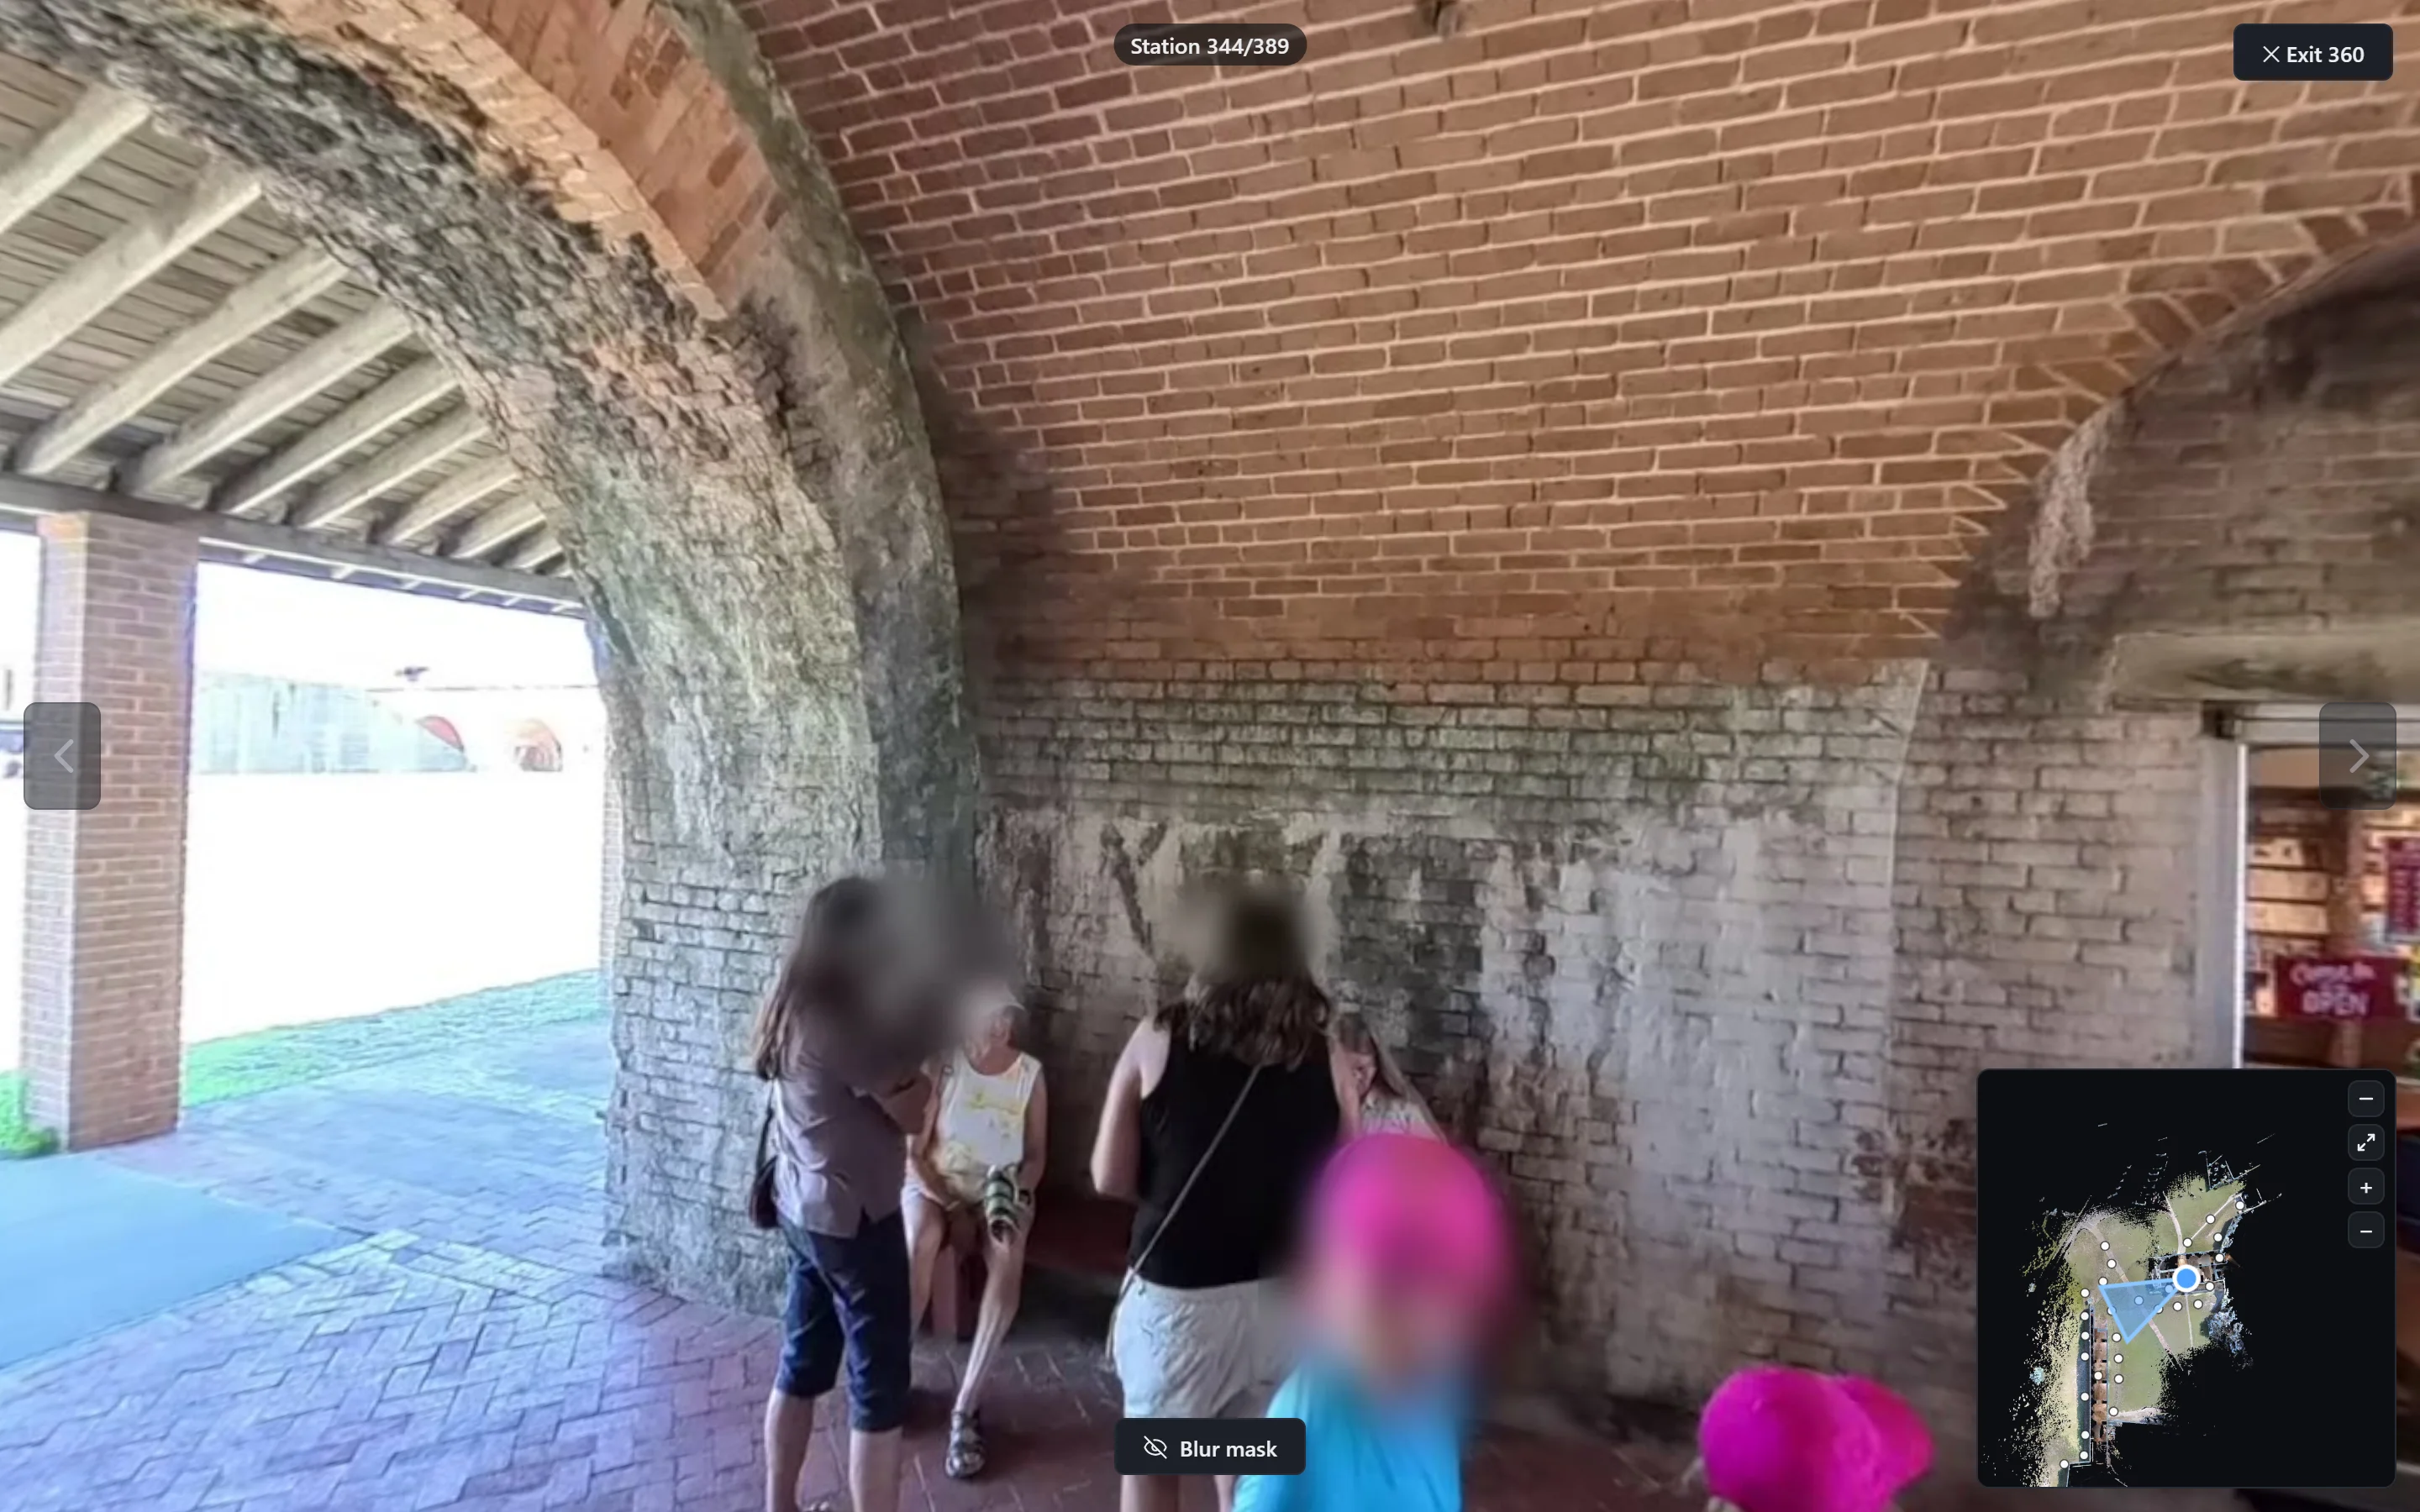
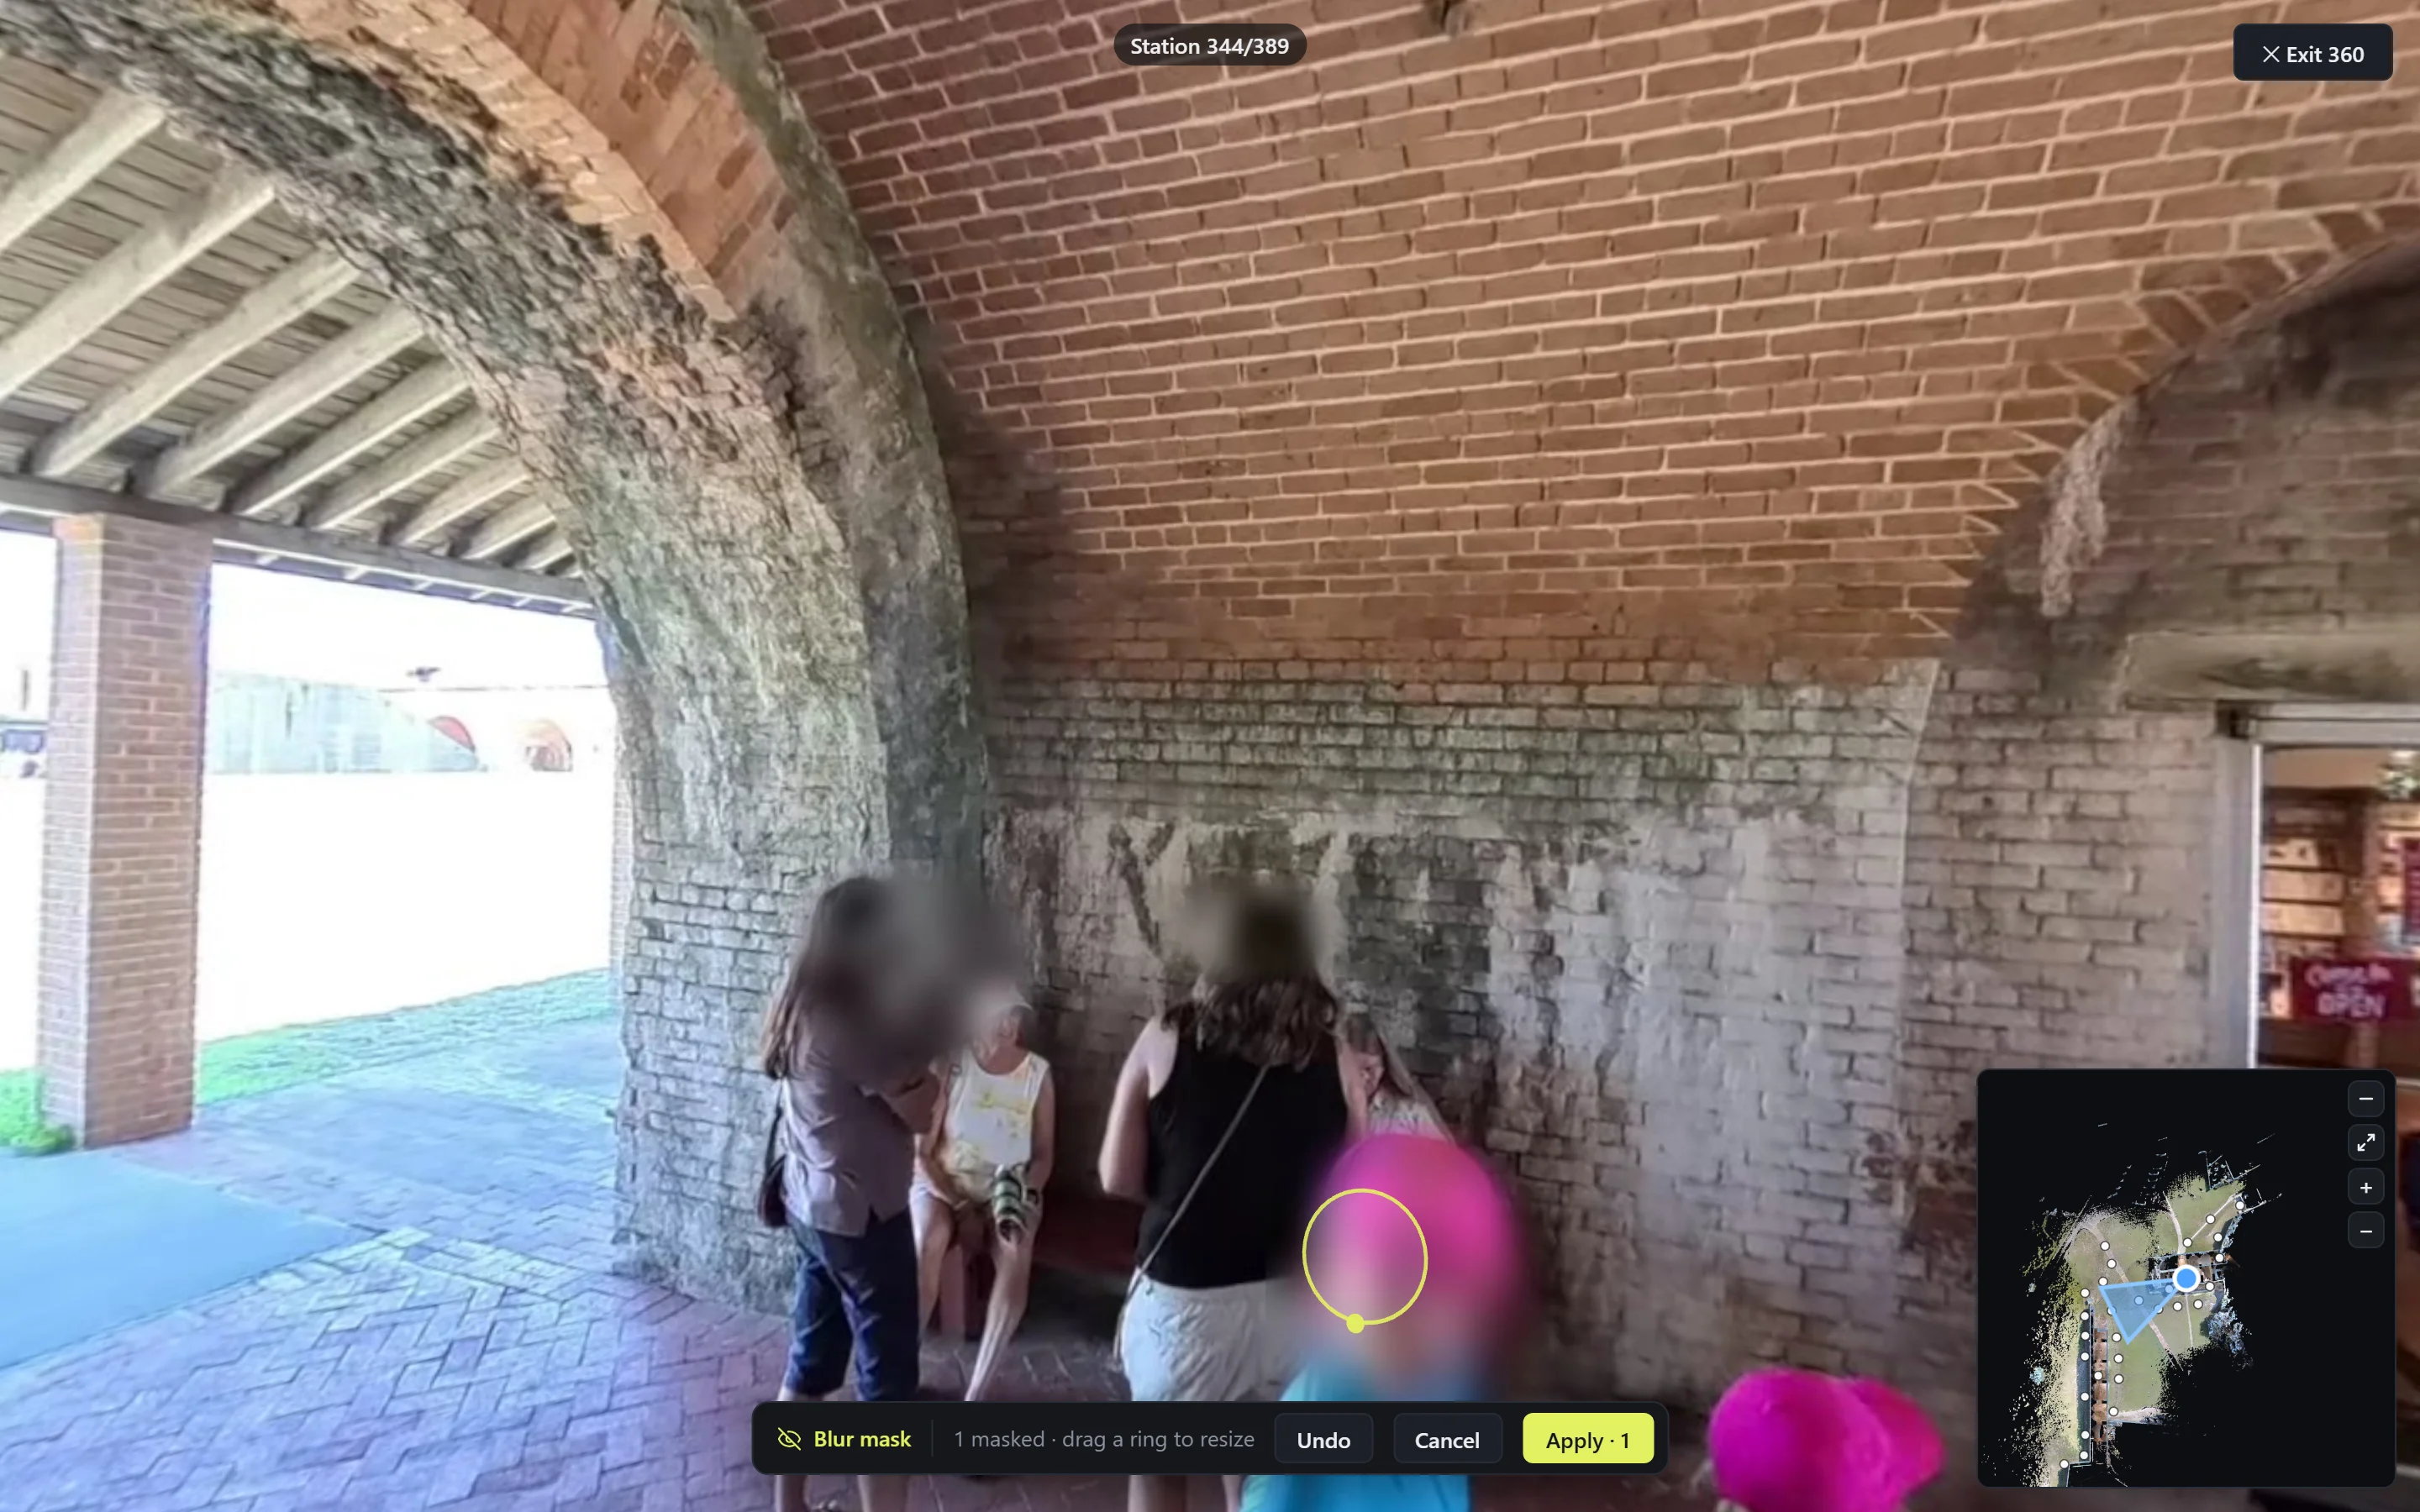
The automatic pass does not catch everyone. Someone seated, far away, turned half away, or partly hidden can slip under it. Before you share a tour, step through the stations that had people in them and check. To mask a face by hand:
- Open the 360 tour panel from the rail and select the station.
- Press View to open its 360 photo.
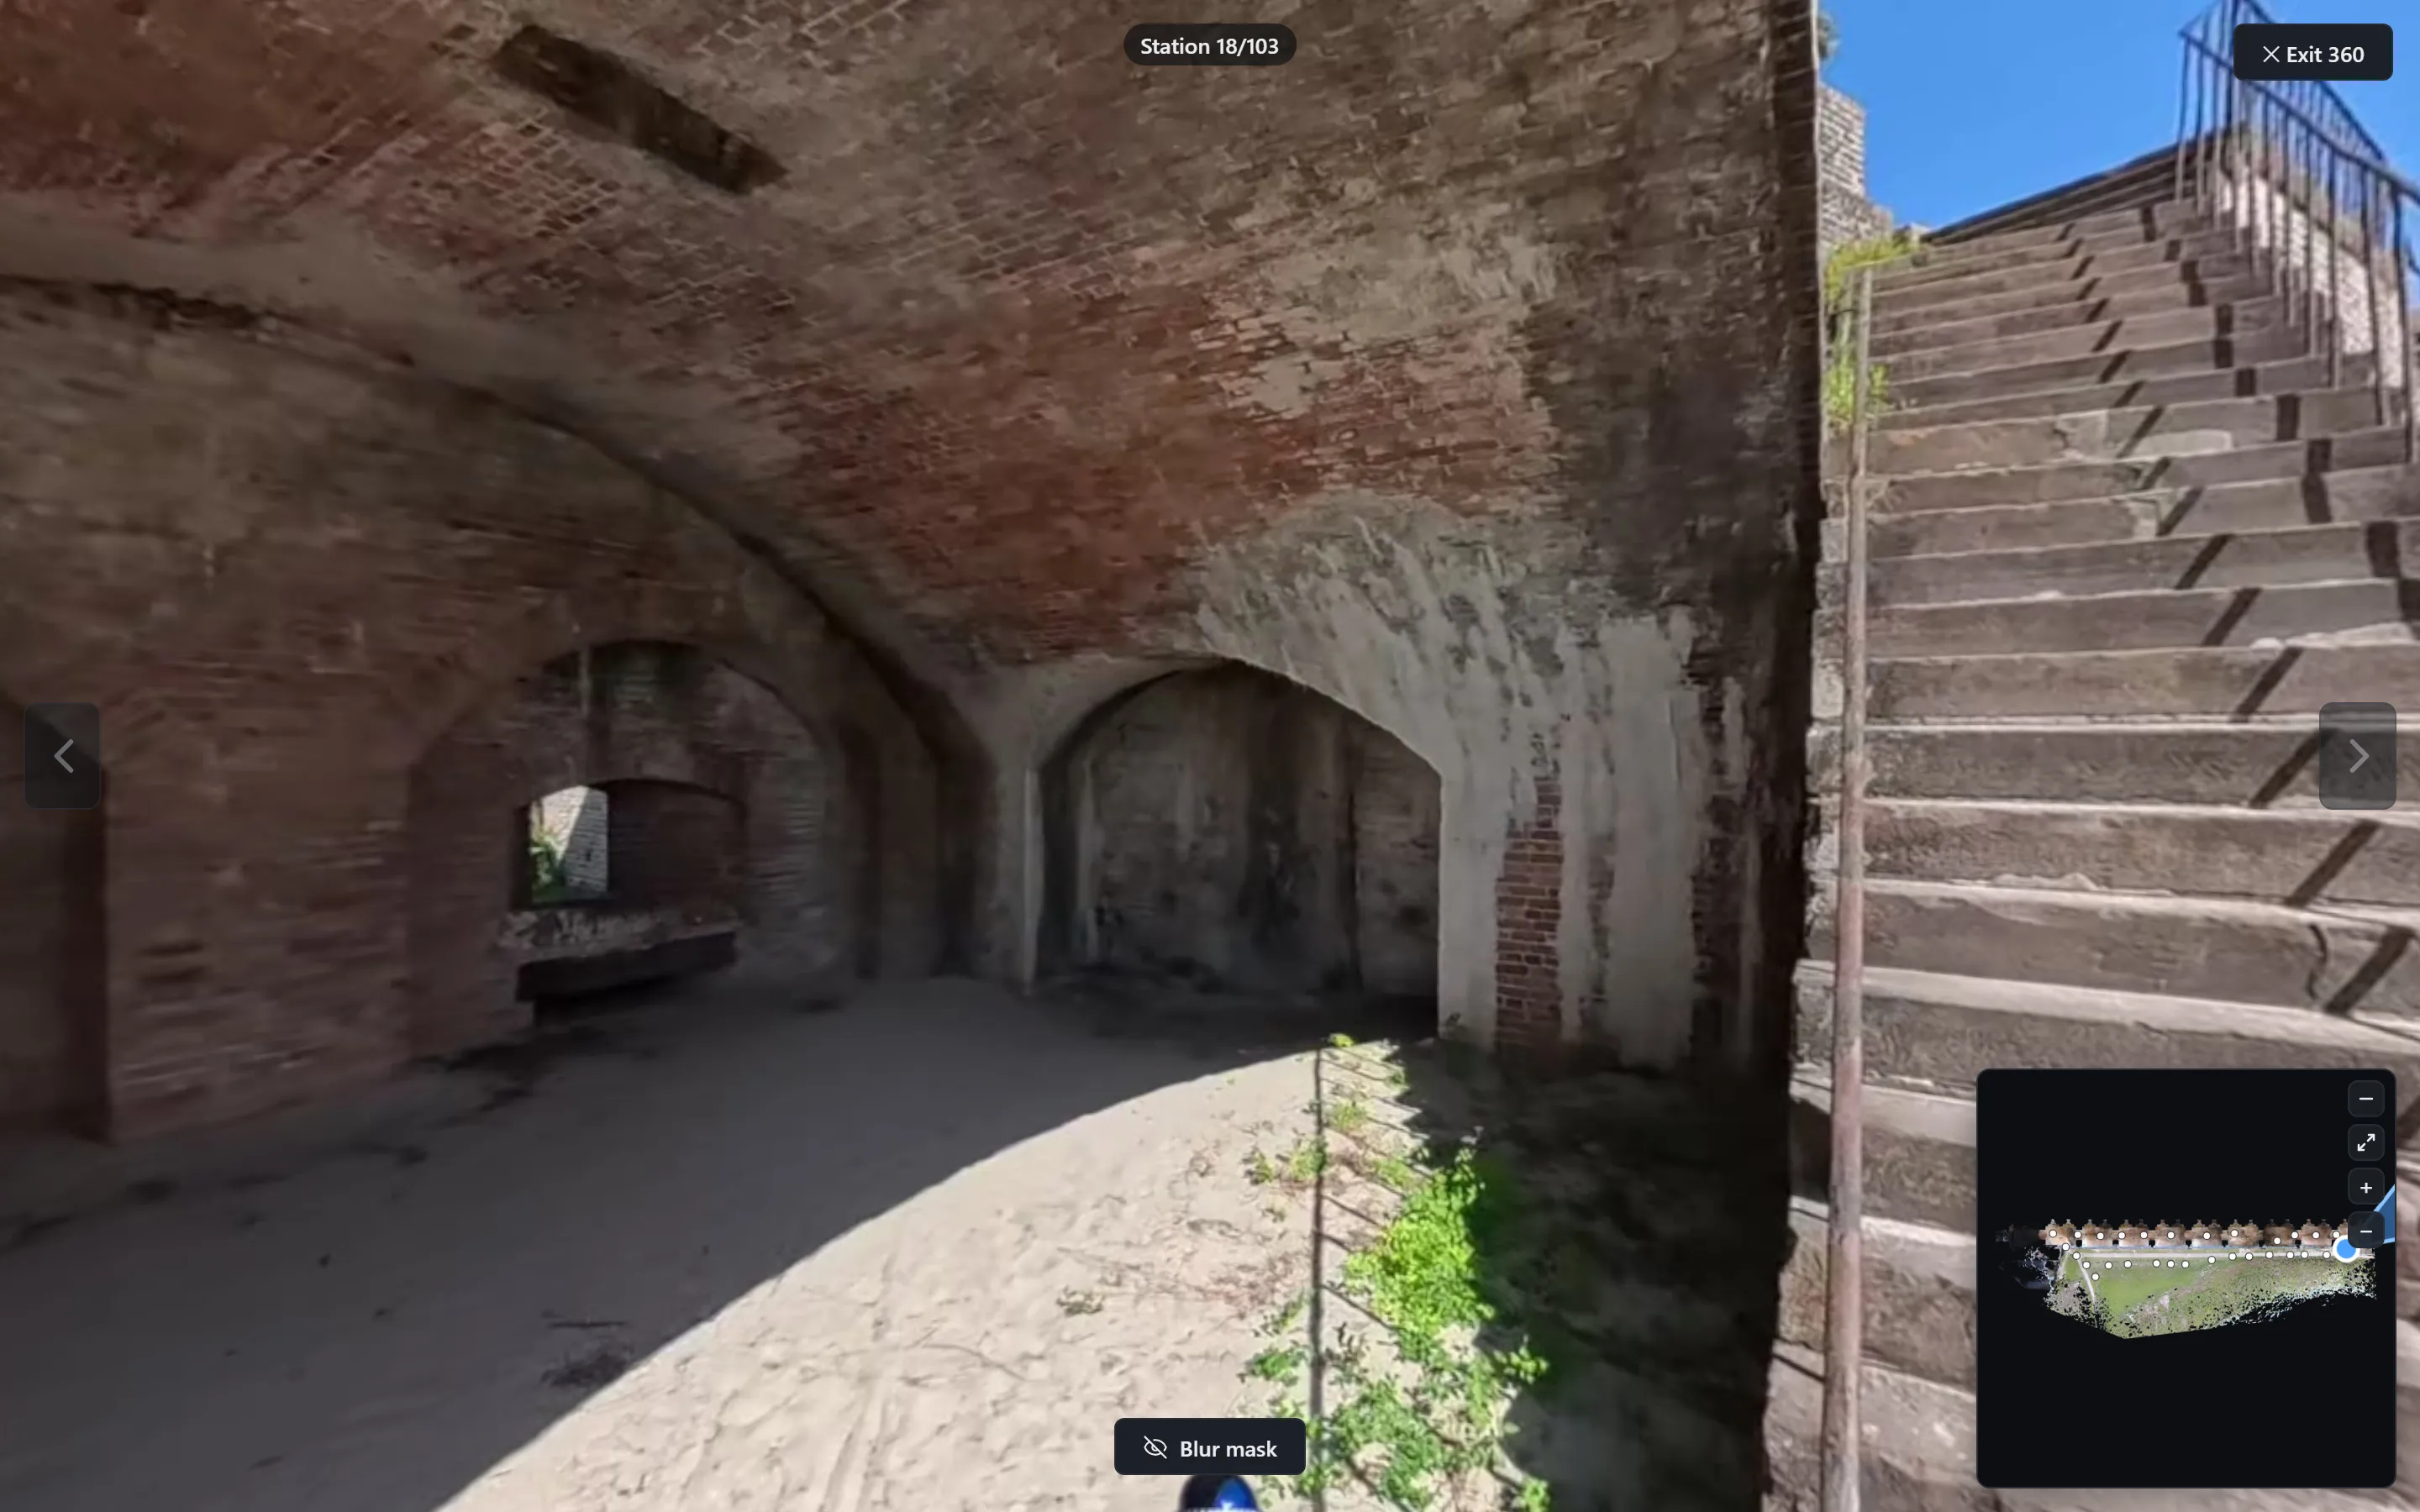
- Press Blur mask at the bottom, then click the face. A disc appears — drag its ring to resize it.
- Press Apply. The mask becomes part of the stored photo and can't be removed later, so place it with care.
Photos only: place each station
Skip this step for video tours — processing already placed those stations. For a photos-only tour, each photo shows unplaced in the tour panel until you put it on the model:
- Open the 360 tour panel from the rail and select an unplaced tile. Its bar appears at the bottom.
- Press View to look around the photo and work out where in the building it was taken. Exit 360 to return to the model.
- Press Place. Set Height to the camera's height above the floor (for example 5' or 1.5 m) — it is remembered for the next stations.
- Click the floor in the model where the camera stood. The station lands there and the panel moves on to the next unplaced photo, so a whole set places click by click.
- When the last one is placed, press Save tour. Then align the stations exactly as for a video tour (step 8 onward). The automatic align button appears once at least four stations are placed; with fewer, align each one by hand (step 11).

Placing a station by hand is free and never uses credits. A placed station shows a solid dot on its tile — placed, but not yet aligned.
The alignment workflow
Aligning a station means confirming its heading, height, and exact position so the photo sits on the model. There are two ways to do it, and the workflow uses both, in this order:
- Automatic first. Run the quick pass on the whole tour (step 9). It aligns most stations on its own and flags the ones it couldn't.
- Read the badges (step 10) to see which stations are done and which need a look.
- Manual for the rest. Fix each flagged station by hand (step 11): pick matching points to place it roughly, let the single-station Auto finish it, and verify in Overlay.
- Save tour (step 12). Nothing is permanent until you do.
Don't start with the manual tools on a fresh tour — on a normal walk the automatic pass handles the large majority of stations, and your time goes only into the handful it flags.
Run the quick pass first
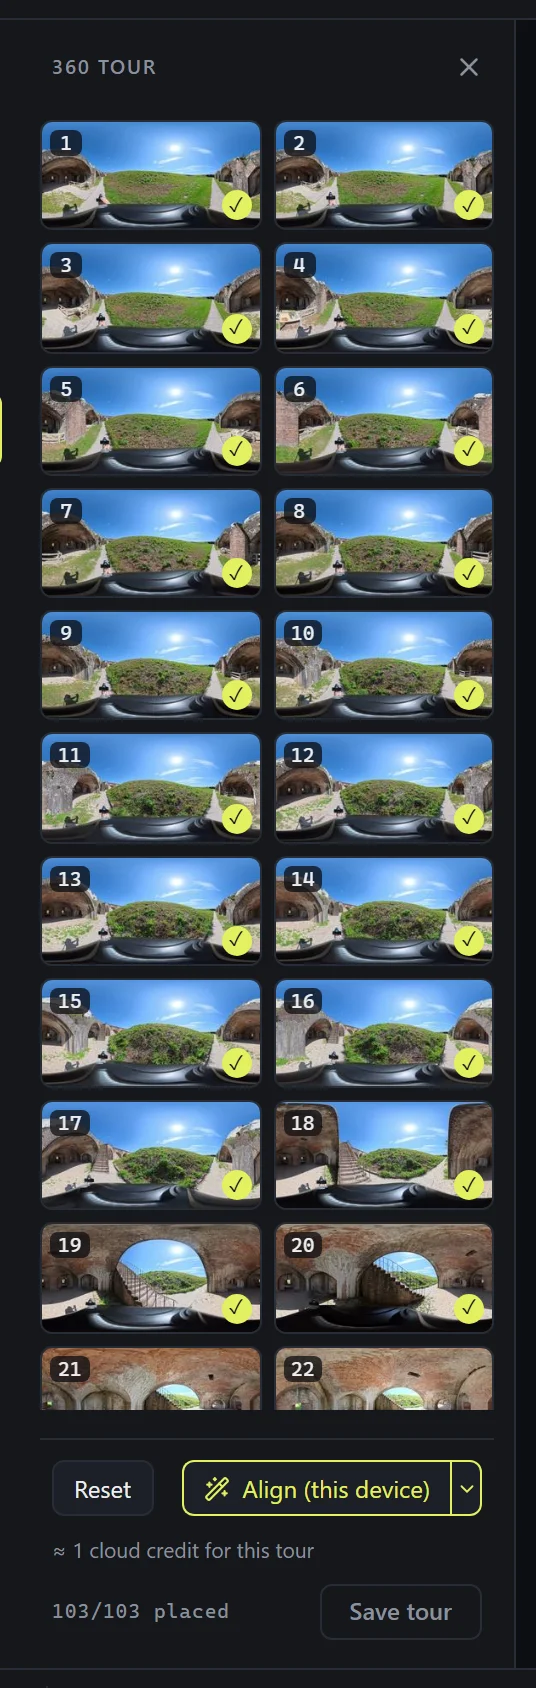
When the tour shows Ready, open the 360 tour panel from the rail (the camera icon). The align button at the bottom runs the automatic alignment on every placed station; the arrow beside it chooses how. It starts on Align (this device) — open the arrow, choose Quick pass, and press the button. Keep the tab open while it runs. (The button appears once at least four stations are placed.)
The quick pass gets everything roughly aligned for free and tells you where to look next. The other two modes go further — here is what each gives you:
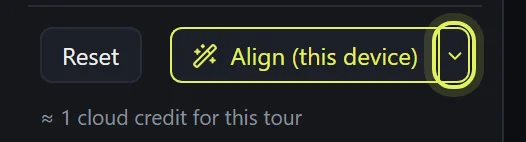
- Quick pass — free. A fast estimate on your device. It solves heading, height, and position for every station and marks each one ✓ or !. Results are estimates, not measured — good enough to walk the tour and to see which stations need work. Start here.
- Align (this device) — 1 credit for a typical tour. The full job: every station is measured against the photos around it and certified, with a cloud double-check. Keep the tab open while it works. Use it when you want the finished, verified tour.
- Align (cloud) — about 4 credits for a typical tour. The same full job, run entirely on our servers. Close the tab and come back to a finished tour. The result is identical to Align (this device) — the extra credits buy walking away, not quality.
The line under the button shows the credit cost of the selected mode for your tour before anything starts; your monthly allowance is on the Account page. Quick pass, hand placement, and fixing stations by hand never use credits. You can run a full align instead of the quick pass, or after it, whenever you want the tour certified.
Read the badges
When the run finishes, every tile in the tour panel wears a badge. Each one tells you what to do next:
- ✓ Verified. The alignment matched the photo to the model with confidence. Nothing to do.
- ! Needs review. The alignment wasn't confident here. Select the tile and fix it by hand (step 11). Hover the badge to read why it was flagged.
- Solid dot — placed, not verified. The station is on the model but no alignment has judged it yet: a fresh placement, a station you moved by hand, or a reset. Run the align, or fix it by hand.
- unplaced. Not on the model yet (photos-only tours). Place it first (step 7).
The counter at the bottom of the panel shows overall progress. Selecting a tile walks you to that station and shows its bar: Align opens the alignment tools, View opens the 360 photo, Move re-places the station, Height sets its eye height.

Fix a station by hand
Select a flagged station and press Align. Two tools open, and you can switch between them any time. Use them in this order.
1. Pick points — the preferred method. The screen splits: model on the left, photo on the right. Click a recognizable feature in the photo, then the same spot in the model (a door corner, a column edge, a window frame). Two pairs are enough to place the station roughly; a third pair shows how well your picks agree, in centimetres. The line at the top of the screen tells you what to click next. Then press Place & check.
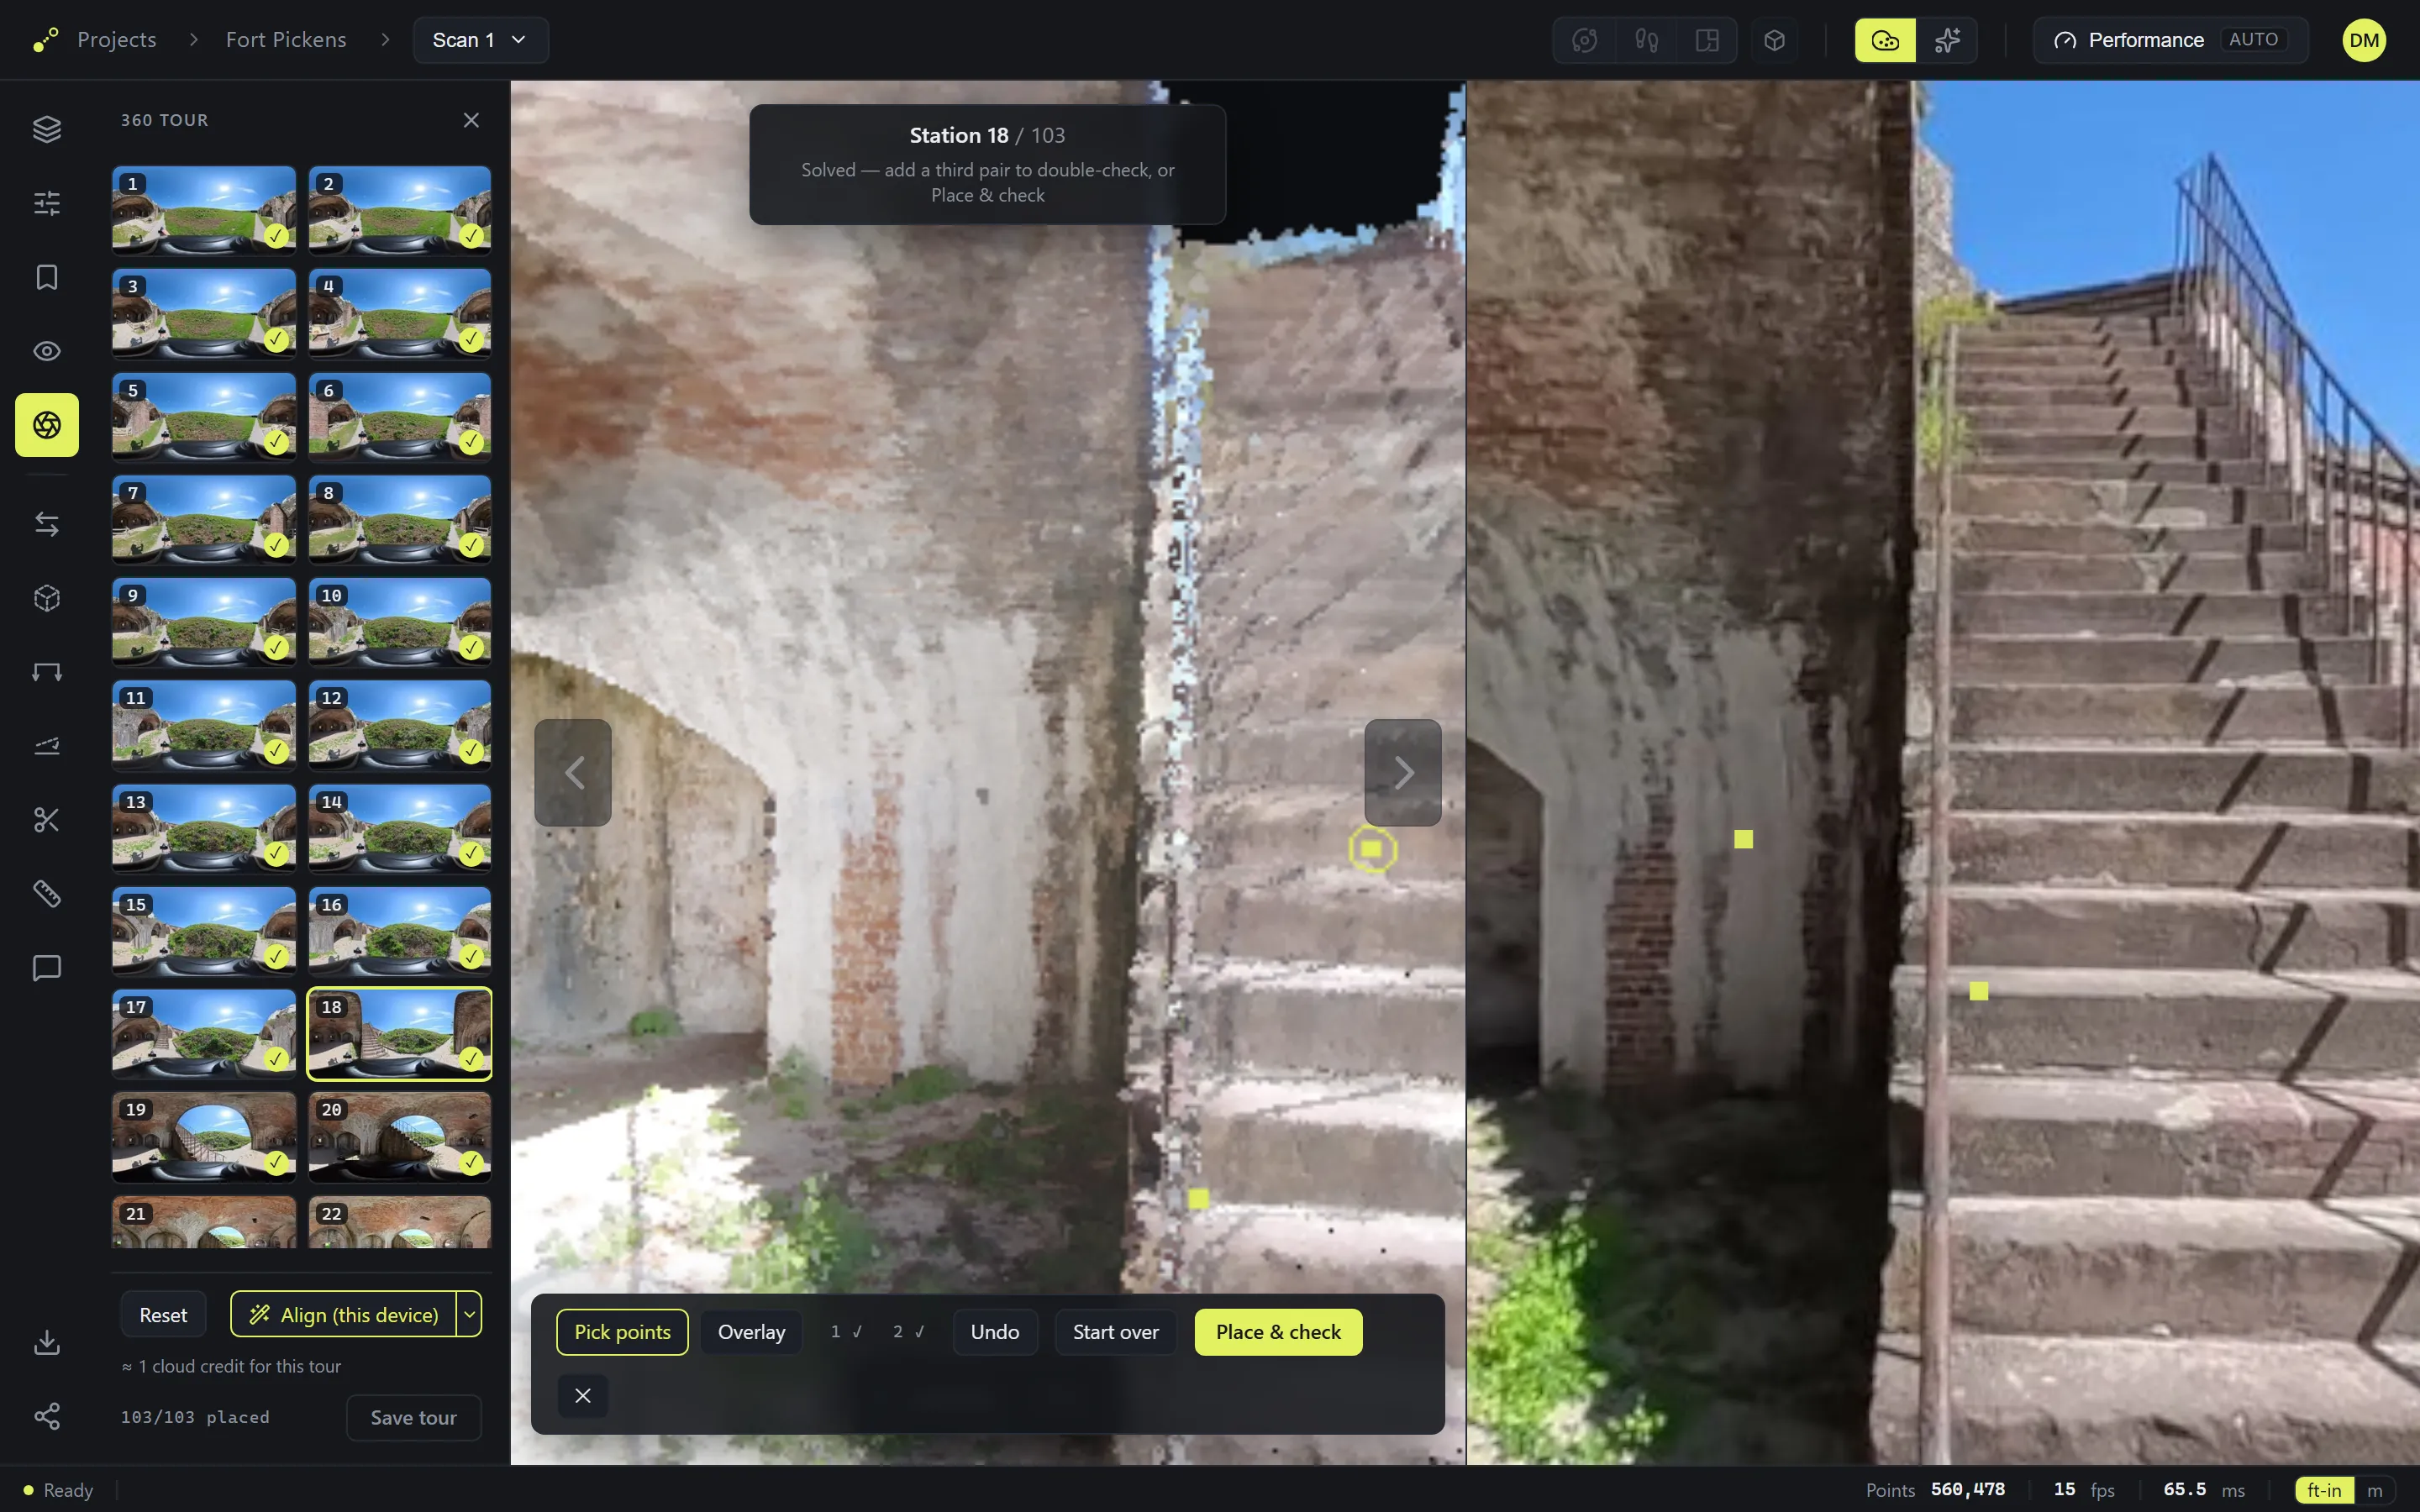
2. Place & check runs Auto for you. Your picks move the station to roughly the right spot, then the single-station Auto runs from there and tries to lock the photo to the model exactly. If it succeeds, the station is marked ✓ and you land in Overlay looking at the result — the line at the top says what was matched. Step to the next flagged station and repeat.
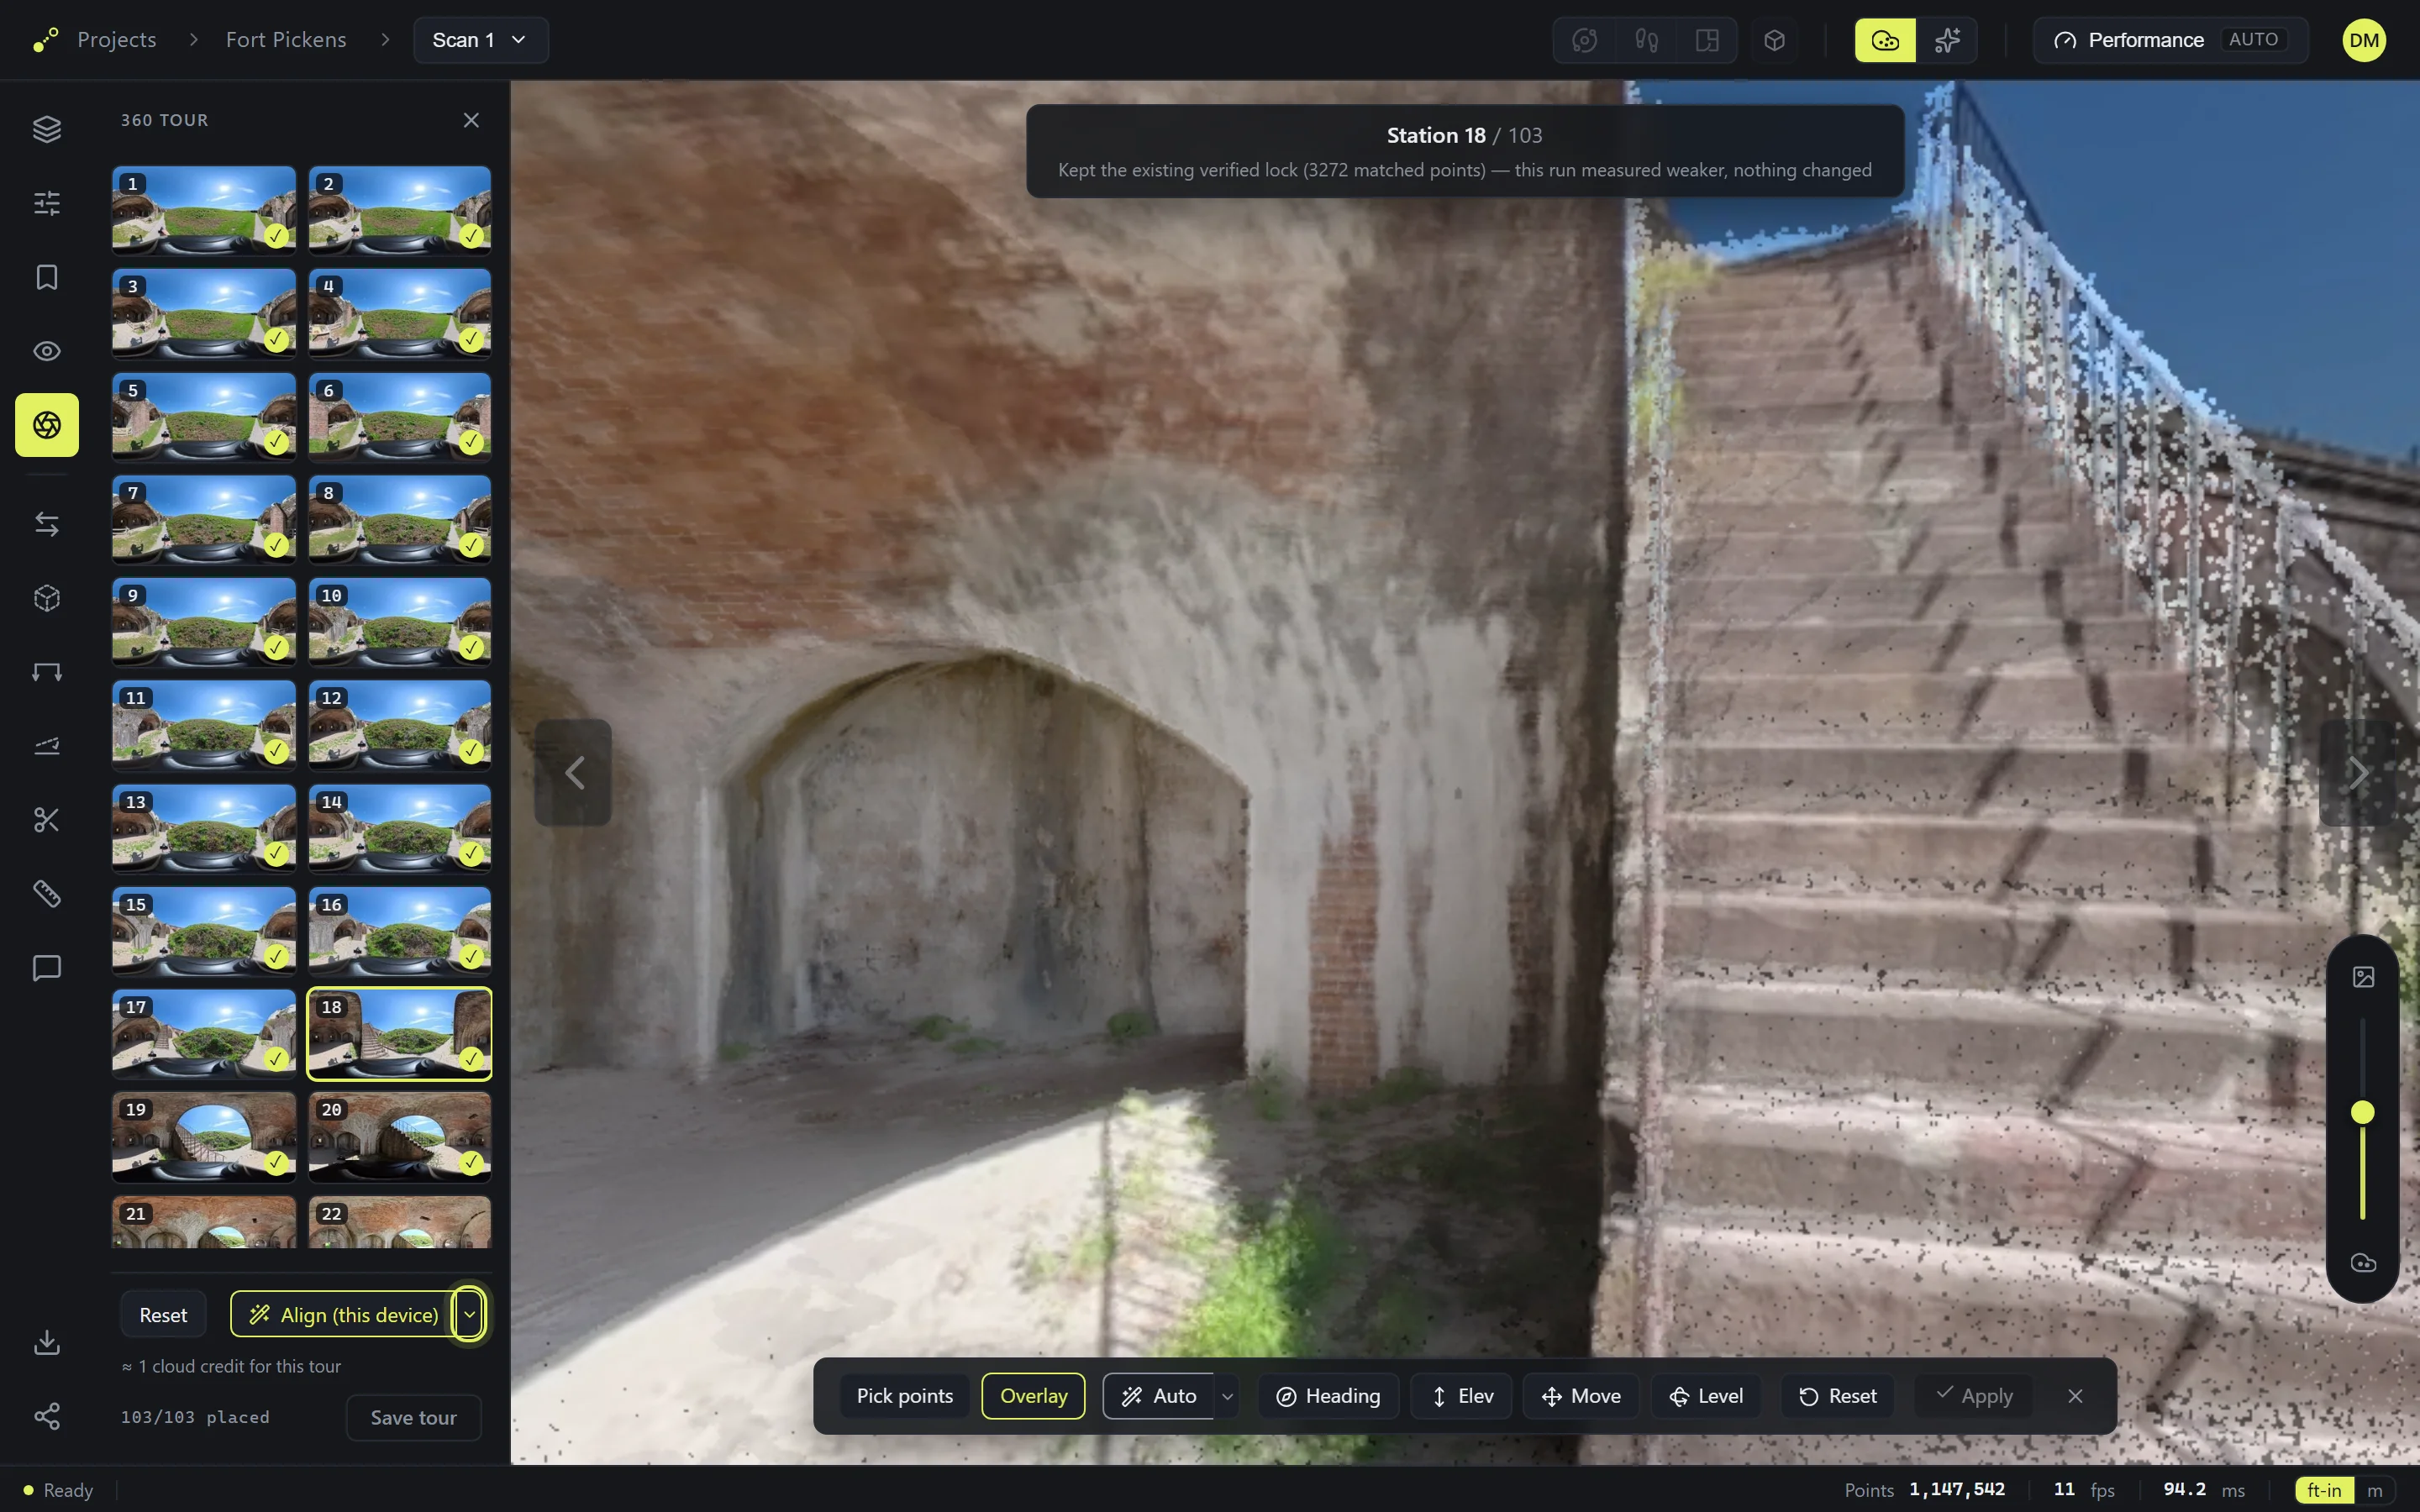
3. If Auto refuses. On a hard station — a bare corridor, a repeating pattern, a station facing a wall — Auto may say it couldn't confirm the match. Press Use best guess to keep its closest attempt as a starting point, then nudge in Overlay and press Auto again (the arrow beside it has a slower thorough option). Different picks, a station further from the wall, or a better feature often make the difference.
4. Overlay — verify, and adjust if needed. The photo ghosts over the model; the slider on the right blends between them. Use it to check any station: walls should sit on walls, floor edges on floor edges. If something is off, adjust Heading, Elev (camera height — labelled Height when a floor is detected), Move, and Level until it matches, then press Auto once more to see if it now locks. Apply keeps your adjustment; Reset on the bar returns this one station to where it started.

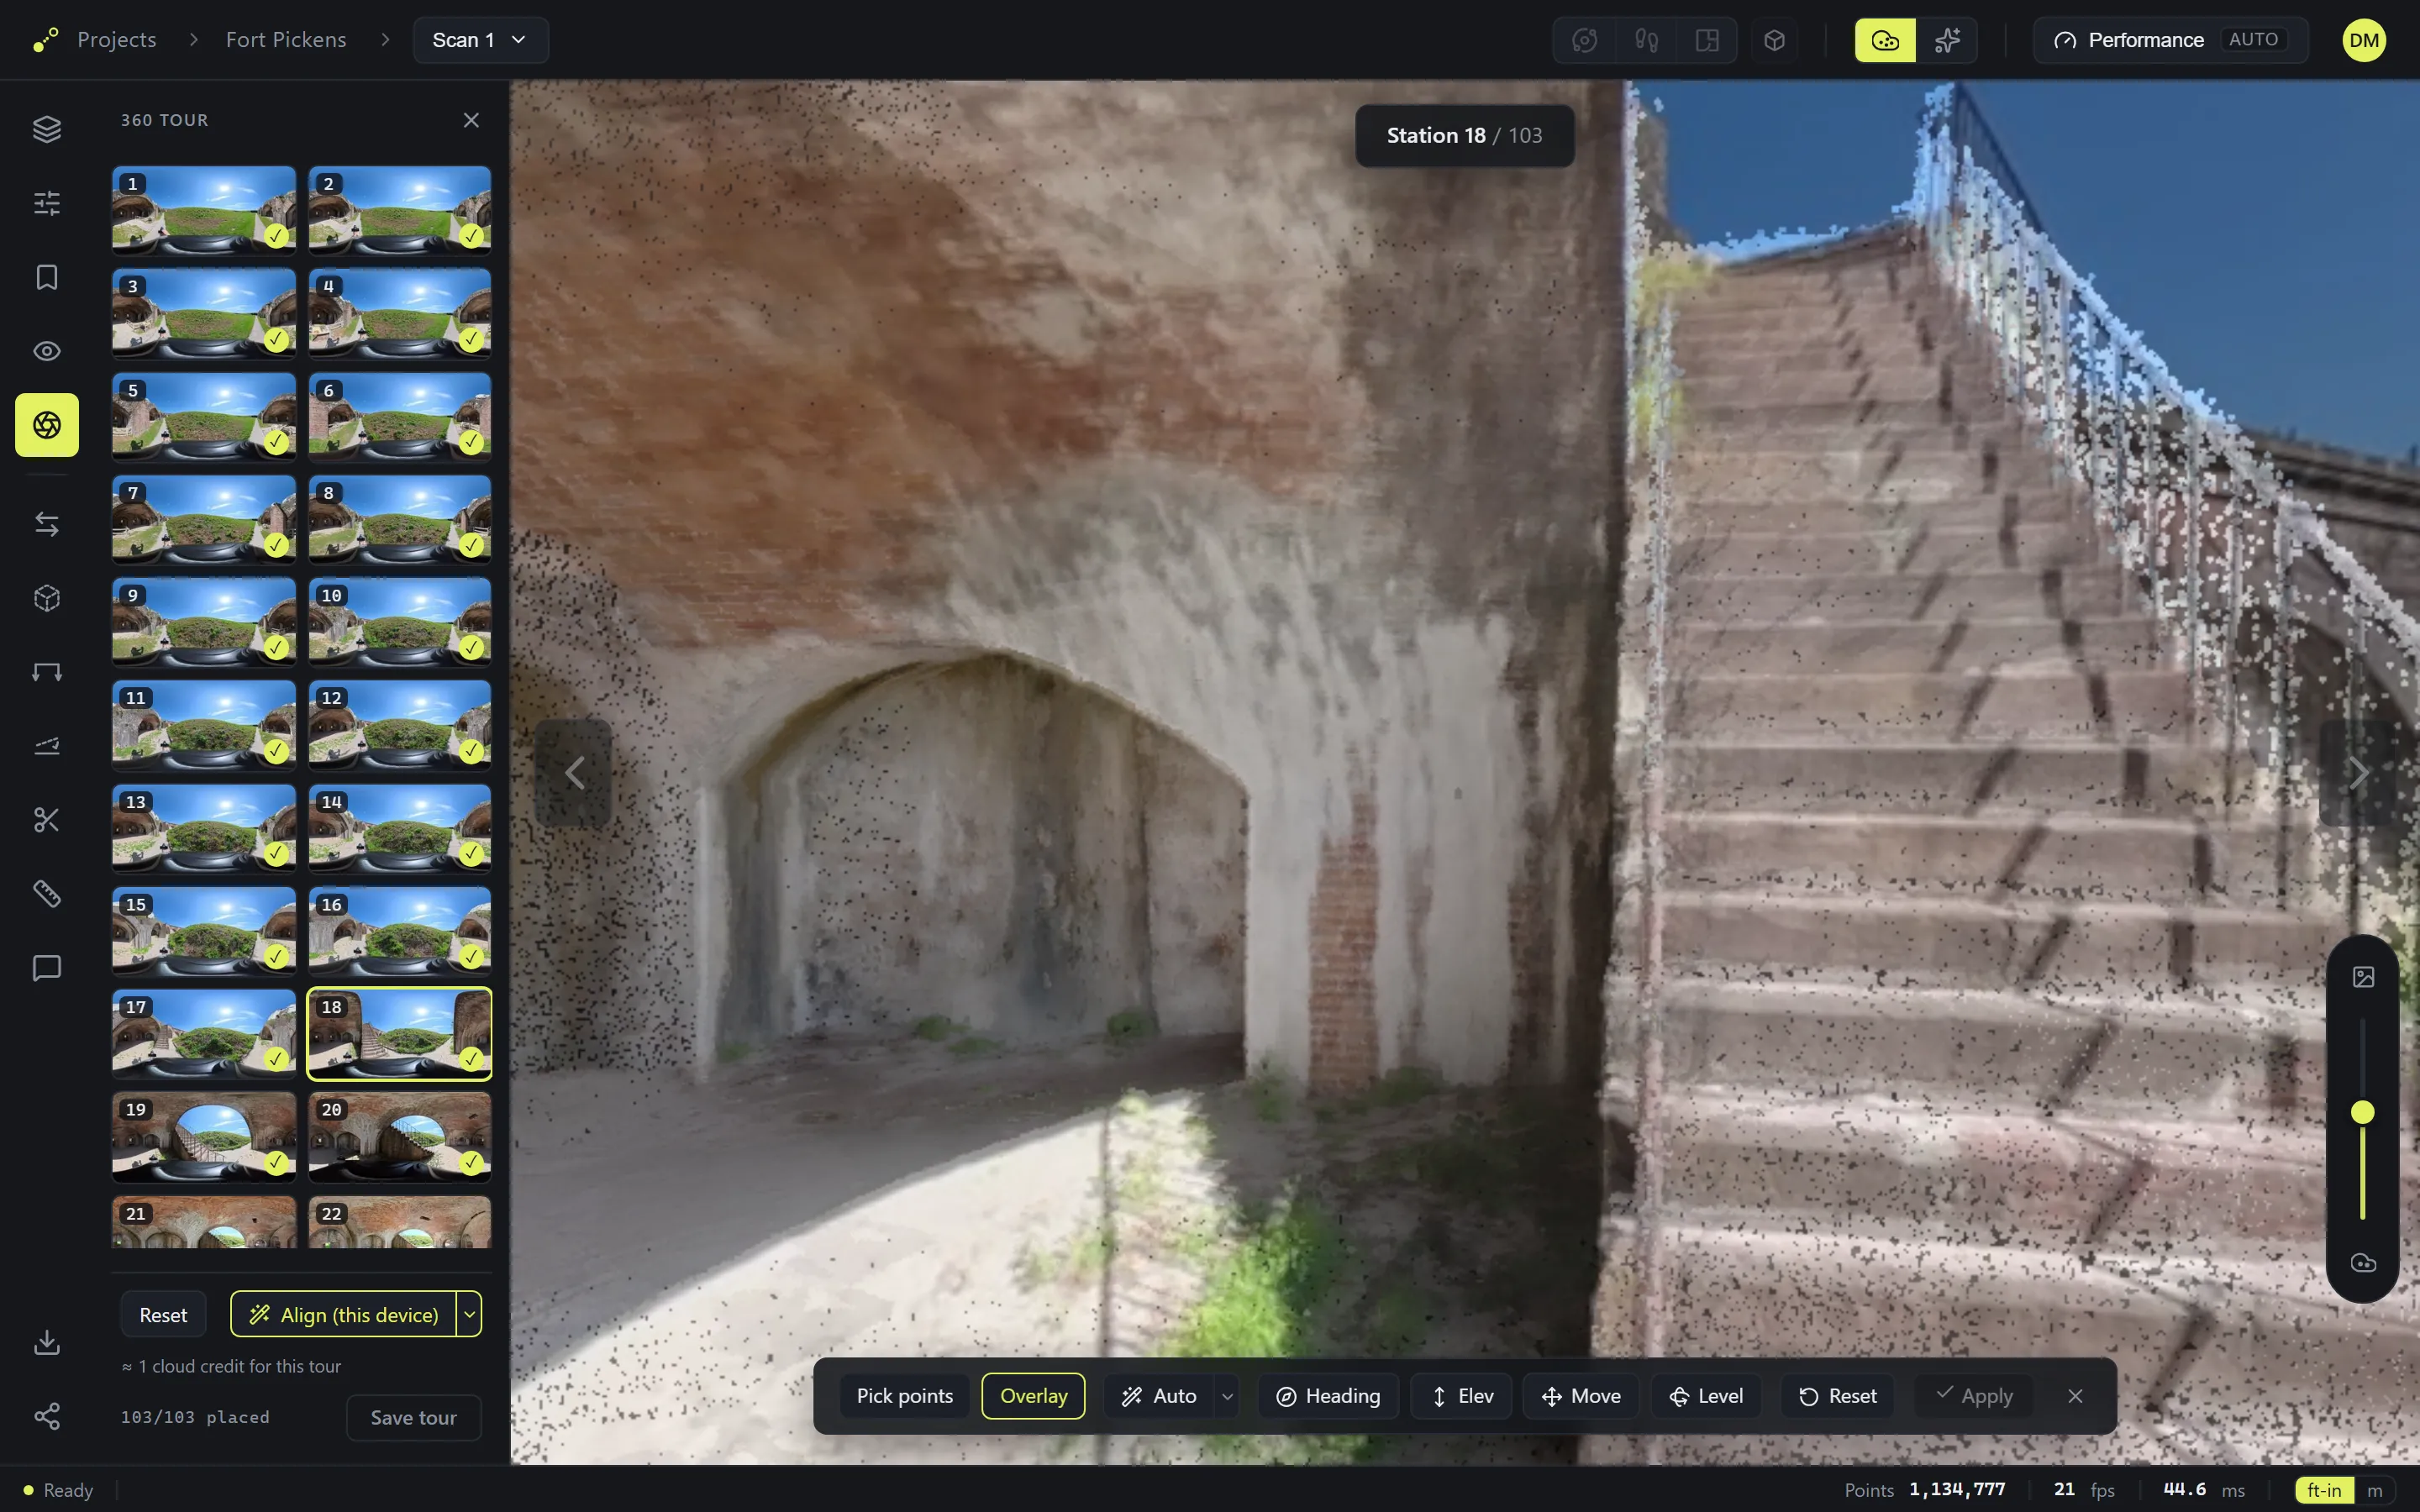
When Auto never locks: after several attempts on the same station, a manual alignment in Overlay is all that can be done — line the photo up by eye with Heading, Elev, Move, and Level, and press Apply. The station keeps a solid dot rather than a ✓, because no automatic check confirmed it, but it will look right in the tour. This is normal for a few stations in feature-poor spaces.
To leave the alignment tools, press Esc or the X at the end of the bar. Selecting another station's tile while aligning steps straight to that station without leaving.
Save the tour
Press Save tour at the bottom of the tour panel. Placements, alignments, and verdicts are drafts until you do — closing the viewer without saving loses them. Save as often as you like while working through a long tour.
Reset returns every station to the scan path if you want a clean start. Both are safe: nothing changes for anyone viewing a shared link until you save.
Walk the finished tour
Walk up to any station in the viewer — or pick one from the tour panel — and open its 360. You're standing in the real photo: drag to look around, use the arrows at the screen edges to step to the next or previous station, and Exit 360 (top right) returns you to the model. The corner map shows where you're standing the whole time.
Visitors on a shared link get the same tour, aligned as you saved it — see Sharing projects.